Top quality throughout the production process

The production of float glass is a complex process that involves several stages, from melting and refining, to the float bath, coating, annealing, and cutting. At each stage, various issues can occur that can impair the quality of the final product.
For instance, air bubbles or impurities in the raw materials used for melting and refining can lead to defects in the glass. Similarly, problems during the float bath stage, such as inclusions, bubbles and striations, can result in uneven thickness or surface irregularities.
Throughout the entire production process ISRA VISION inspection systems ensure the quality of float glass, from the cooling of the glass ribbon to cutting the finished glass plate. Our automated systems detect and classify even the tiniest defects or abnormalities in the glass. This helps to prevent issues from occurring in the first place and ensures that the final product meets the necessary quality standards.
Glass ribbon inspection
During the float glass production stages, industry-proven inspection systems monitor the quality of the glass ribbon in real-time. From the hot end to the cold section of the float line, the systems ensure compliance with the strictest quality standards.
On the moving glass ribbon, the advanced systems accurately detect and classify distorting and non-distorting defects down to the micrometer range.
Reliable quality from the hot end to the cold section of the float line
Mounted directly after the float bath, the optical inspection systems precisely measure the glass thickness, width and position of the glass ribbon at the earliest possible point. Thanks to their patented measurement technology, the systems are adaptive and unaffected by glass thickness, transmission deviations, bending or tilt. An intuitive and user-friendly interface clearly visualizes the processes with individually selectable display options. Based on several patented ISRA technologies, such as Cross Dark Field and Moiré, the inspection systems guarantee the highest precision in optical measurement and thus enable glass production with lower thickness tolerance limits.
Exact glass tension monitoring
At the cold end of the float line, a specially developed inspection system reliably records a precise stress profile. It combines the results with data from the thickness measurement to optimize the learning process and ensure the production of stress-free glass. The system immediately informs the user of process-related changes so that he can quickly take corrective action.
Inline inspection of coating color
Seamless control of the glass coating color is provided by a coating inspection system equipped with innovative RGB color camera technology. The system reliably and precisely detects inhomogeneity defects inline and ensures a uniform appearance of the glass ribbon.
Throughout the float glass production process, our systems collect inspection data while production management software analyzes this data. This enables manufacturers to optimize process efficiency, increase the amount of marketable material, and ensure a fast return on investment.
Benefits
- Automated fully integrated surface inspection including
- Inspection of homogenous color appearances
- Earliest possible online thickness and width measurement of the ribbon
- Customized quality grading
- Glass stress measurement
- Statistics and analysis tools for process optimization
- Features
- Typical defects
- Technical data
- Moiré technolgy - certified optical measurement of high-quality glass
- High-performance classification
- Advanced LED-illumination technology
- Tolerant to thickness, transmission and color variation
- A single camera bank combined with switchable LED illumination generates different views to reliably distinguish between defects
- Up to 5 optical channels in one system
- Surface defects: scratches, streaks, bubbles, cracks, rough spots
- Edge defects: chips, cracks, uneven edges
- Thickness variations
- Optical defects: color variations, haze, warping, distortion
- Chemical defects: impurities or incomplete mixing of ingredients
- Tension defects: bowing or twisting of the glass ribbon
- Contamination defects: foreign particles, dust, dirt, sand grain
- Measuring range 1 – 20 mm, Option 32 mm
- Glass transmission > 35 %, Option > 8%
- Measuring resolution 0.1 µm (for thickness measurement)
- Spatial resolution 1 mm (for thickness measurement)
- Approx. cycle time 85 s (45 s at high-speed mode)
Download additional information
 asdf
asdf
Brochure Float Glass [EN]
- Filename
- brochure-float-glass-next-generation-glass-en.pdf
- Size
- 695 KB
- Format
 test123
Brochure Float Glass [CN]
- Filename
- brochure-float-glass-next-generation-glass-cn.pdf
- Size
- 831 KB
- Format
How leading glass manufacturers stabilize processes and reduce waste
Glass plate inspection
Various defects in the manufacture of float glass plates can lead to optical distortion, reduced strength, or increased vulnerability to breakage, and compromised functionality. The defects range from edge defects, uneven flatness, inhomogeneities in color and coating, to faulty lamination and powder particles settling on the glass surface. ISRA VISION inline surface inspection systems are suitable for all pane sizes and thicknesses. They precisely inspect the edges and the entire glass surface, even at high production speeds, to prevent the further processing of defective glass panes.
Smooth glass edges
To avoid edge and grinding defects, an edge inspection system checks the glass edges for all typical defects. The system analyzes the generated images in real-time and detects and classifies all edge defects. This enables automatic quality classification of the glass plates. Based on the collected data, the ideal replacement time for the grinding wheel and edge cutter can be determined. On the market, the system is the only one that detects asymmetries in the grinding at an early stage, optimizes the process and avoids rejects.
Uniform glass flatness
Flatness irregularities as well as optical distortions are inspected on the entire glass surface in less than 10 seconds with a special surface inspection system. The fast, non-contact measurement provides reproducible results with accuracy down to the micrometer range. This avoids problems in downstream process steps and ensures an attractive appearance.
Flawless glass coating
Optimal coating of glass plates is ensured by another specially developed inline inspection system. It detects problems in all coating processes at an early stage and classifies all typical coating and arcing defects precisely. Its integrated evaluation system reliably detects inhomogeneities or major quality deviations and ensures uniform coating applications.
Consistent color homogeneity
Inhomogeneity in the color of the glass coating can deteriorate the aesthetics and optical properties of the glass. A special optical inspection system detects problems in the coating process at an early stage and precisely detects color inhomogeneity on the entire glass surface. A combination of modern color camera technology and broadband LED illumination covers the entire visible color spectrum, guaranteeing the product quality delivered.
Reliable glass lamination
Laminating defects occur in laminated glass when two or more layers of float glass sheets are laminated together. Typical defects such as bubbles, delamination and uneven adhesion between layers can weaken the glass and compromise its safety. A special laminate inspection system reliably detects and classifies all relevant adhesive defects on glass, PVB interlayer, and edges. With an optional reflection channel, the system determines the height of defects in the laminate and thus localizes the causes of the defects.
Particle-free glass plates
To prevent float glass plates from sticking together during transportation due to adhesion forces and chemical reactions, as well as to protect their coatings, glass interlayer powders are applied to glass sheets. Our latest surface inspection system records the number of interlayer powder particles and provides statistics on bead size. In addition, both the area coverage and the density of the powder by particle type are displayed with real-time visual measurement data. The system can be fully integrated with the plant control system and plant network, helping to deliver particle-free glass plates.
Benefits
- Smooth glass edges
- Uniform glass flatness
- Flawless glass coating
- Consistent color homogeneity
- Reliable glass lamination
- Particle-free glass plates
- Features
- Typical defects
- Technical data
- Multiple high-resolution cameras and special illumination systems enable an all-round view of the edge
- Full altitude map of the 3D form and a corresponding curvature map of the glass
- Modern color camera technology and broadband LED illumination covers the entire visible color spectrum
- Chips, cracks, and irregularities in thickness
- Waves, ripples, and distortions in the surface of the glass
- Uneven coating thickness, bubbles, and scratches
- Variations in color intensity or hue
- Bubbles, delamination, and uneven adhesion between the glass layers
- Surface defects like: stones, bubbles, Tin defects, Fine scratches, Cullet chip, Water traces
- Resolution better 33 μm
- Waviness and flatness measurement in < 10 sec.
- Edge measurement with up to 80m/sec for glasses from 1 to 6 mm
- Up to 3.400 mm width for coating and color inspection
- Different illuminations channels like:
- Transmission Bright Field
- Cross Dark Field
- Transmission Dark Field
Download additional information

Brochure P² (Powerplate) [EN]
- Filename
- brochure-powerplate-glass-en.pdf
- Size
- 1 MB
- Format
Brochure P² (Powerplate) [CN]
- Filename
- brochure-powerplate-glass-cn.pdf
- Size
- 1 MB
- Format

Brochure P² (Powerplate) [KO]
- Filename
- brochure-powerplate-glass-ko.pdf
- Size
- 1 MB
- Format
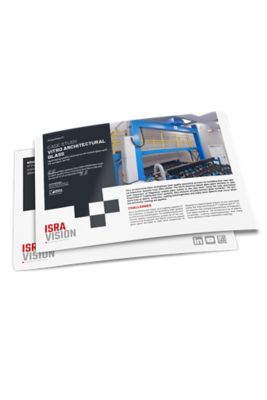
Customer success in float glass – better quality, less waste
Production analytics - Data-driven efficiency
The web-based production analytics platform allows you to check the system status of all production lines at a glance or analyze production data in detail. With the quality management system, you analyze historical data, monitor current inspection data in real-time, and identify future trends in your production process.
Early detection of production defects
Detect and quickly identify the cause of threshold value violations at every stage of production with live status information and automatic alerts. As a result you can quickly resolve production defects, shorten downtime, and reduce production costs.
Predictive maintenance
You can prevent potential system failures by analyzing real-time data from the sensors and monitoring systems. This allows proactive planning of maintenance, based on the actual condition of the machines, instead of following a fixed schedule. This data-driven approach saves costs through reduced downtime and increased overall productivity, as well as longer production line life.
Optimization of production
Dashboards allow you to compare production line and product data onsite or remotely, providing key insights for optimization. This enables you to make informed professional decisions along your value chain to increase the product quality as well as profitability. You can continuously track the progress of optimization measures and present them with visualized advanced reports.
Your benefits
- Time-saving multi-line overviews, one view for all quality-related information
- Minimize downtime by monitoring system health data
- Faster reaction to quality issues with quality data monitoring
- Fast elimination of production defects, reduction of production costs
- Improved maintenance for reduced downtime, higher overall productivity and longer production line life
Key Features
- Overview on production data and plant status
- Live insights from real time data
- Department oriented dashboards, customer specific adaptations are possible
- Web-based solution, no client software installation required
- Threshold monitoring and alerting
- Open to integrate relevant third-party data and export data to the customer's systems
Service solutions and individual trainings
For the efficient and future-proof operation of your production systems our highly qualified service teams support you globally in all matters. We provide the implementation, maintenance and servicing as well as the analysis and optimization of your systems.
Learn in the ISRA VISION Academy how our competent trainers always keep your employees up to date with the latest knowledge so that system operators, product engineers and quality managers become real inspection experts.


